Nobody wants to be hassled with a tedious setup. It eats a lot of time. Not to mention, it can test your patience.
Also, If you tend to move your working space often, a standing desk that’s easy to set up is a plus. You will not be hassled if you need to disassemble the desk so that it can fit into your doorway. You can easily set it up again!
So how does the FEZIBO standing desk rate in terms of the setup? And how do you install the desk? We will be discovering the answer to these in a few.

Shipping and unboxing
Before we head on to the juice of this article, allow us to share our unboxing experience with you. This standing desk comes in a two-piece top, so the box isn’t too large and will easily fit through your doors.
So, it’s pretty decent, the parts are all snuck in separately in styrofoam/ cardboard material. So that protects it from any damages during the transit. The accessories are individually wrapped in plastic.
Upon unboxing, you’ll see the motor and the leg frames on top. And the two-piece desktop is snuck in at the bottom of the box.
As for the heftiness? The package isn’t too heavy. But you can actually tell that the leg frames have a bit of weight to them. So they are not cheaply light.
Now let’s get on to the setup
Okay, so we’re going to set up a Fezibo standing desk. How long do you reckon it will take us? Well, as per the manufacturer, you will be able to set it up in less than 15 minutes. That’s also one of the brand’s selling points, the faster assembly time.
Connecting the frames and feet
- To make up for a more organized setup, remove all the parts from the box and lay them down on the floor. If you have wooden floors, be sure to put a blanket before placing all the metal parts on the floor. This will prevent damage to your expensive oak wood floors. Keep all the accessories packed separately. We don’t want to miss any of them.
- Make sure to have a clean area first so nothing that can disrupt this project. You can turn on music while you’re at it too. And why not vacuum the floors so you don’t have to later? haha.
- You have an option to use the desk with caster wheels. So we are going to give this one a go. So go ahead and get your base plates. Remove the guides that are attached to each end of the base. Then replace it with the caster wheels, unscrewing using your hands. Pop in the caster wheels on the screw, then tighten them using an Allen wrench. That is also provided in the box.
- Then we are going to connect the leg frame to the foot. Screw them diagonally first by hand, then tighten the connection with an Allen wrench. Do the same thing with the other leg. Be sure to use the same screw set that is indicated in the manual.
You will be using the M8 screws for this part. And each foot will have 4 screws that connect it to the leg frame.
- Flip the unit over. So the bottom side of the desk will be facing you. You will find that the leg that contains the motor is a bit unstable. So you might need someone to hold it for you. Otherwise, you can use your foot to ground it in place.
- Now get the crossbar and we’ll attach them to the legs. We will be needing the L screws for this part. The opening on the crossbar should be facing the front while the tabs should be on the top side facing you.
- Line up the screws on the screw holes and snuck them in. Screw it in by hand then tighten it with an Allen wrench.
- Make sure that all 3 scores on each side are nice and tight.
- Get the hex rod. First, loosen the screws a bit on the hex rod using the Allen wrench, but not too much.
- It needs to go straight into both holes on each end of the desk. You’ll see two screw holes on each side. Snuck them in, tighten the connection with the Allen wrench.
- Then we need to attach the side brackets to the top of the frame on each side. We will be needing the L screws for this part.
- Get one bracket. You will notice that there’s a part that protrudes, this should be facing downwards. Align the screw holes and snuck the 2 screws in. Then tighten them down. Do the same thing on the other side.
- Now we’re done with the frame.it’s time to connect the two desktops.
Connecting the desktop
- We need the following accesorios: 5 r pegs or connectors, a bracket, and 12 j screws.
- Lay the two pieces of the tabletop on the floor, with the bottom part facing up. This is where all the screw holes are.
- Then slide all the r pegs into the screw holes found on the side of one of the tables. Once all the needed pegs in, connect table 1 to table 2.
- Get your 3 brackets. You’ll be able to see 3 pre-drilled holes. And this will tell you where to place them on the desk. You can use a power drill to snuck in the screws, just make sure not to use a high torque setting. Otherwise, you might crack the wood.
- As you drill the screws in, ensure that the two tables are snug in tight.
- Then get your assembled frame. Place it upside down, with the hex facing up. You’ll see pre-drilled holes. Place the frame to the underside of the desktop directly on the pre-drilled holes.
- You’ll be needing j screws to connect the tabletop to the frame. You may also use a power drill.
- Then take the control panel and we are going to connect it to the motor. We are going to use m screws for this one.
- Lay the control panel upside down. You’ll again see predrilled holes, this will indicate where you should place it. Drill the screws in.
- We need to attach the button to the motor. Attach the connector end of the motor to that of the control panel.
- Get your power adapter. Attach it to the remaining cable on the control panel. Snap to clip on, this will hold them tight together.
- Then attach the power cord to the power adapter.
- You can also install the storage drawer, it will be easier at this point. Get the two metal parts that will connect the drawer to the table. Just bend the parts with the broken lines according to the instruction manual.
- You need M screws for this part. The little tab that protrudes will hold the drawer, it should go to the back part of the table. Lay the connecting parts on the predrilled holes, then drill the screws in.
- Now let’s set up the wire tray. You’ll see broken lines on some parts of the wire tray, bend it
- Lay it on the pre-drilled holes then drill the screws in.
- Flip the desk over and all that’s left to do is attach the canvas drawer. Just slide it in between the two connecting meta parts that we have drilled earlier.
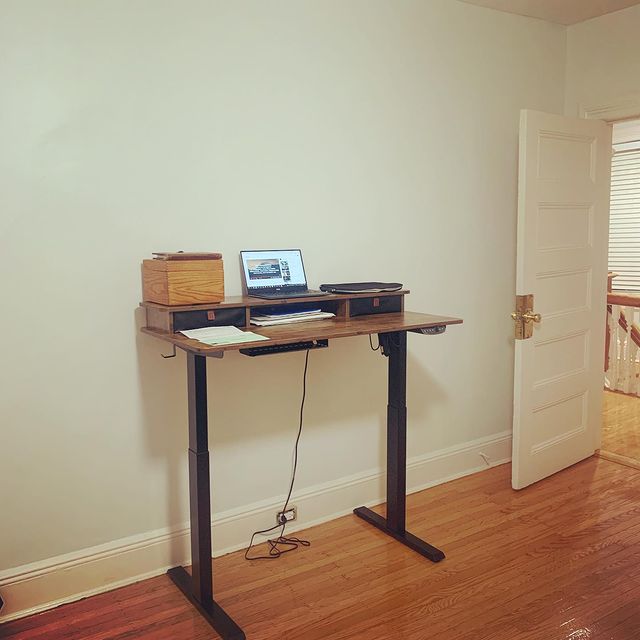
- Now all you gotta do is reset the desk by hiding the down button, then you’re all set!
Final Say
Overall, it’s pretty easy to set it up. Though there are parts where you wished you had three hands haha. So it will be easier if you can ask for help and faster if you have another hand grounding desk.